Think about it … fifteen minutes from now, you could be writing your own blog. Five simple steps will get you there, and I’ll walk you through them. No technical skills required.
I’ve really enjoyed doing my own outdoor blog. I’ve equally enjoyed learning from other blogs. It’s this knowledge-sharing that makes our community so tight. Why not pitch in your own voice? It’s so much easier than you think. This article will help you get launched.
Remember this: If you can type, you can blog!
Even if you can’t type, you can blog … just more slowly 😉
The point is, you don’t have to be a computer guru.
As we get you set up, there will be a couple of steps that sound technical. They’re not. The process is easier than it looks.
Let’s get going.
Step One: The Web Host
The first thing we need to do is get you an account with a Web Host.
What’s a web host? Think of it this way: every website and blog has to run on a web server. Most of us lack the resources or know-how to run a web server. That’s where the web host comes in. This is a company that runs thousands of web servers for people. They do all of the work.
Maybe think of a web host as a hotel. They provide the rooms, the furniture, the bedding, and the housekeeping. All you need to do is rent a room. That’s your blog. What you do in that room is your business. Providing the room and keeping it in tip-top shape is their business.
My favorite web host over the years is Dreamhost. They’re incredibly reliable and, best of all, one of the most affordable options out there.
And let’s make sure you get a good deal. First, I recommend you go with a yearly plan – that will save you some bucks. And to save you even more, if you sign up through the link below it will save you another $50 on their Unlimited plan.
Go ahead and click this button (we’ll keep this page open so you can refer back to it):
Step 2: Your Domain
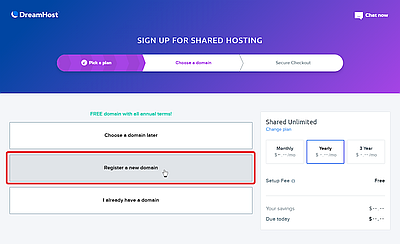
As you sign up, it will ask if you want to Register a New Domain. Choose this option.
What’s a domain? This is the name of your website, like ramblinjim.com (the name of my site).
Enter the domain name you’d like to have – all lowercase, and include “.com” or “.blog” or whatnot – then click the search button. It will tell you if the domain is available and offer suggestions if it isn’t.
Once you find a winner, click Add.
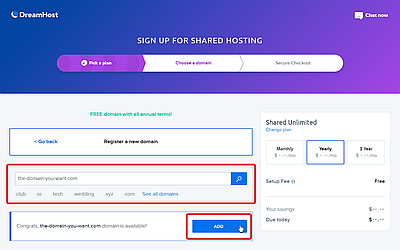
Tip: It might be tough to find a “.com” name that’s available. Try “.org” or, better yet, “.blog”
Step 3: Finish Checkout
Now you’ll see some Additional Options:
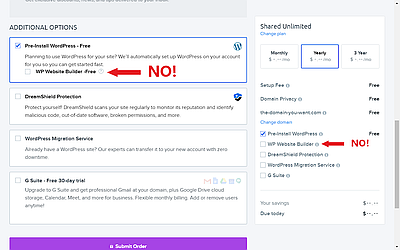
✗ DON’T:
Choose Install WP Website Builder. It just complicates things.
The other options are up to you.
Go ahead and finish checking out.
Remember the email address and password you use. You’ll need those to manage your account in the future.
Step 4: Check Your Email
You’ll get a couple of important emails. One of them will ask you to confirm your contact information. Do this.
The other email may take a few minutes to show up. This one helps you set up WordPress on your site:
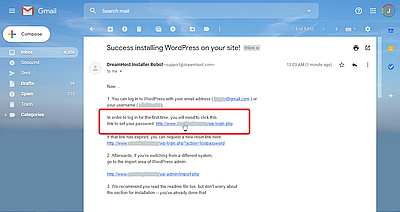
When it comes, click the link to set your password. It will take you to a page like this:
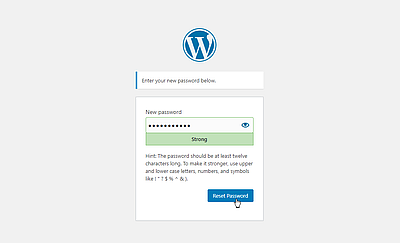
IMPORTANT: Remember your password! From now on, you’ll log into your blog with the email you used with Dreamhost and this password!
After you set up your password, click log in:
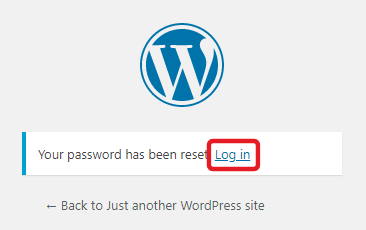
Step 5: Set Up WordPress
In just a few mouse clicks, you’re going to have a working website.
Your website uses a program called WordPress to handle all of the visuals for you. When you log in, you’ll see something like this:
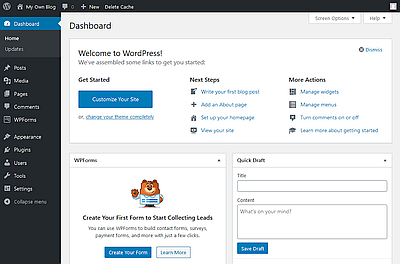
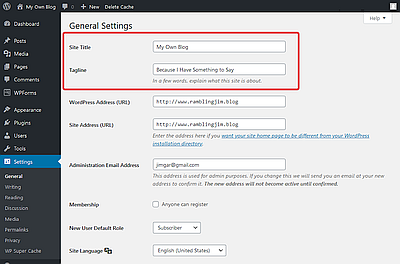
This is central command for your blog. The first thing we need to do is give your blog a proper title. Click Settings at the bottom > General:
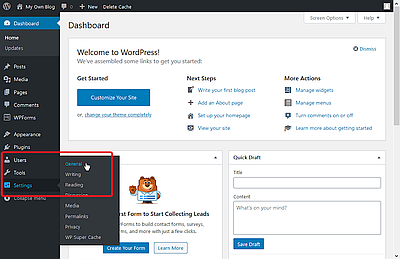
Change the Site Title and Tagline to whatever you want readers to see in your blog’s heading. Scroll to the bottom of the page and click Save Changes.
Write Your First Post!
In your WordPress dashboard, click Posts on the left > Add New.

You’ll now find yourself in something that looks like a word processor. And that’s just how you use it.
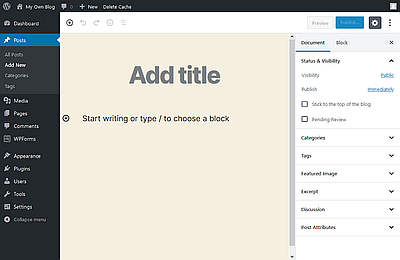
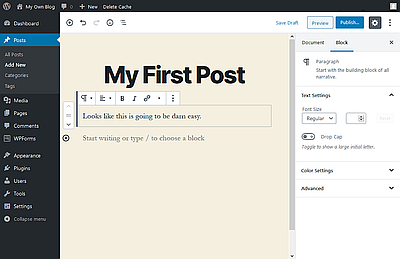
Start by giving your post a title. Then click in the Paragraph box below it and type away …
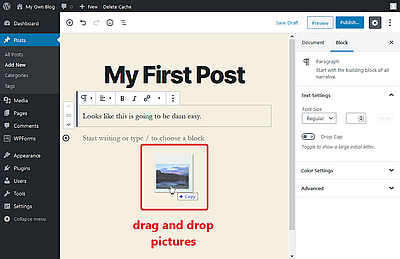
If you want to add a photo, just drag-and-drop it into place:
When you’re done, click Publish in the upper right-hand corner.

See the Result
To see the result, click the name of your site in the upper left-hand corner, next to the Home icon:

This takes you to your actual website:

Don’t worry about the control bar at the top; you’re the only one who can see that. It’s got some quick commands for adding new posts, editing the page you see, going back to the control panel, etc.
Where Do I Go from Here?
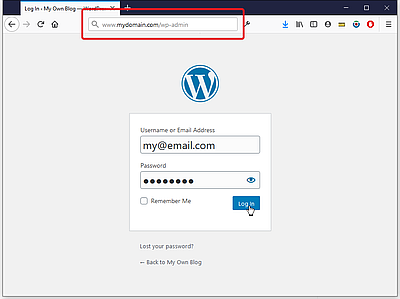
You need to remember how to log into your blog. The link is http://[your domain name]/wp-admin like this:
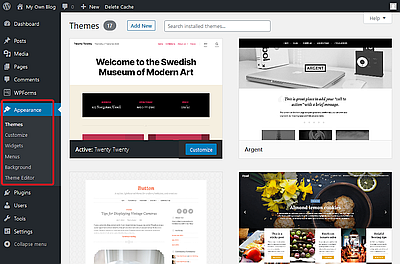
You also have a lot of control over the look and feel of the site. So much control, in fact, that we can’t go into it here. But to find the settings, go to Appearance in the control panel:
From here, I recommend you go to YouTube and search for WordPress for Beginners. You’ll see a lot of great tutorials to help you make a fantastic-looking blog.